


Frameless Shower Enclosure | Custom by DBM Factory


Frameless Shower Enclosure
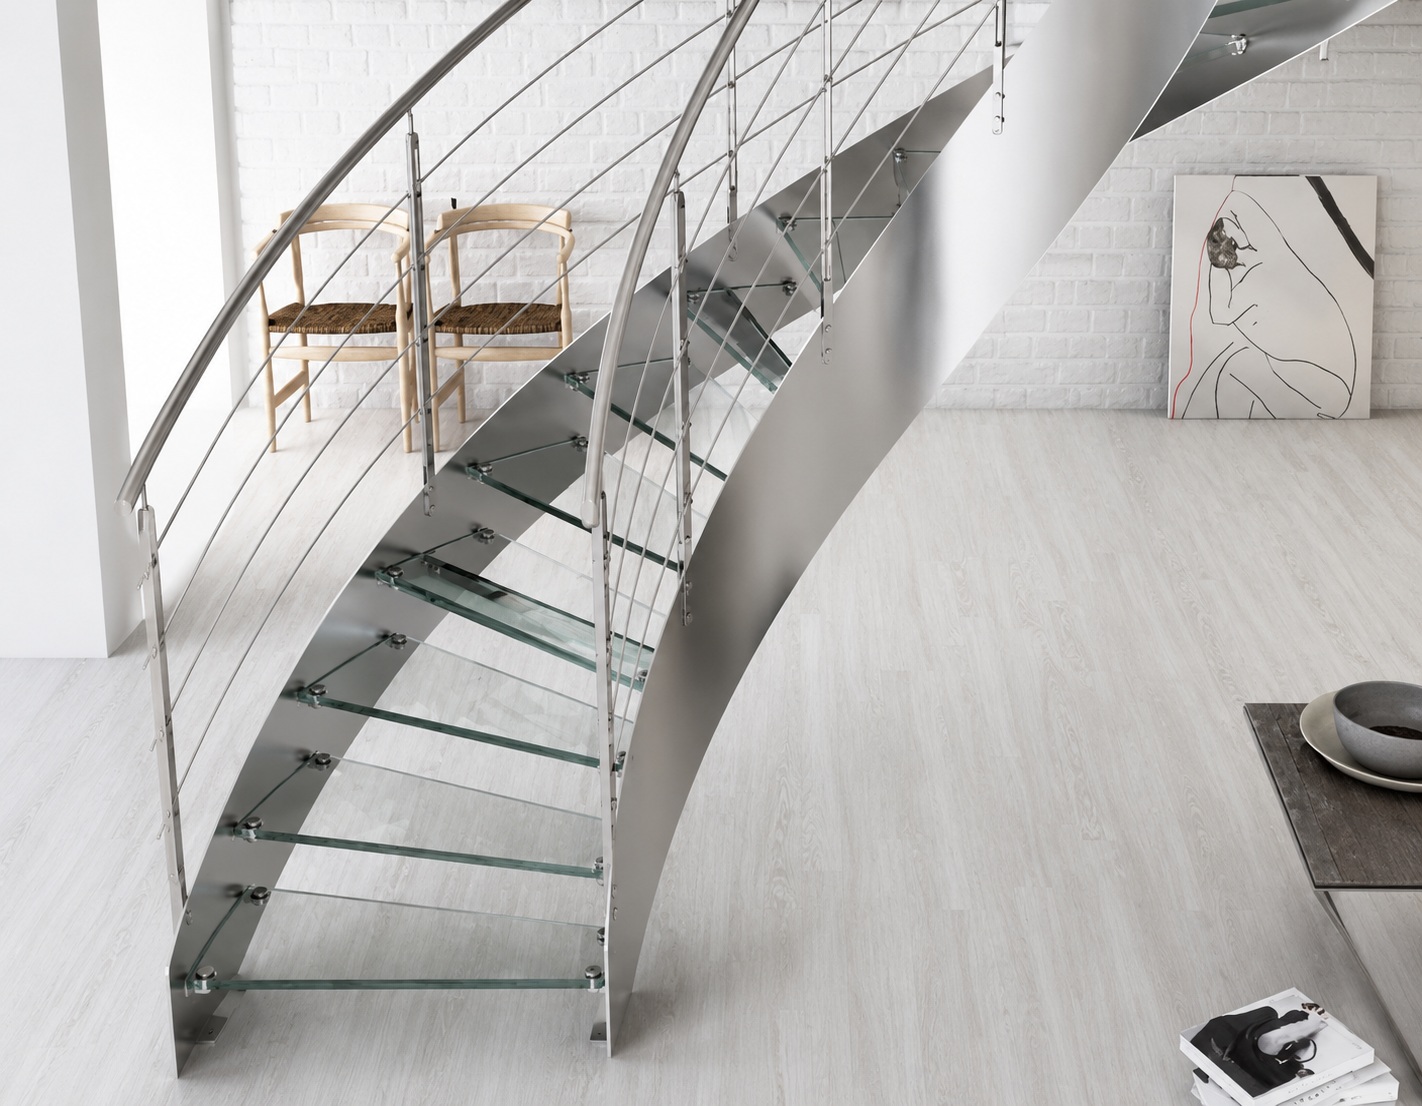
A frameless enclosure is a clear glass box held with the minimum possible hardware. No metal rail at the top, no aluminum surround at the sides. The glass itself is the line, and the tile, stone, or brassware does the talking. It is the choice when the bathroom is meant to read as one continuous, calm space.
We design and produce each frameless enclosure around your project. Share the bathroom layout, a floor plan, or a designer reference. We turn it into a working drawing and build the glass and hardware ready for shipment.
Spec the Enclosure to the Bathroom
Tempered Safety Glass — Drawing-Set
Standard tempered safety glass for residential enclosures; a heavier gauge where the run is longer or where the look calls for the substantial read. Low-iron glass on request.
Hardware Finish — Brass / Black / Nickel
Brushed brass for warm, soft-classic bathrooms. Matt black where the design language is contemporary. Brushed nickel and polished chrome where the rest of the brassware is one of those two. Hardware finish always matches the room tapware.
Hinge Style — Glass-to-Glass / Glass-to-Wall
Glass-to-glass hinges where the door swings between two glass panels. Glass-to-wall hinges where the door swings off a tiled return. The right choice falls out of the bathroom plan; we work it through on the drawing.
Door Config — Swing Style / Standard or Both-Way
Single pivoting door for the typical residential enclosure. In-and-out swinging hinges for larger doors where the owner wants the door to open both directions. Final choice set against bathroom-floor clearances.
Where It Fits — Four Common Project Types
Villa Primary Bathroom
The owner’s en-suite where the stone, the brassware, and the lighting are all considered. A frameless enclosure keeps the eye on those finishes rather than on the shower hardware — the glass disappears into the room.
Modern New Home
Drawn into the architect’s plan from the start so the glass joints line up with the tile setting-out. Matt-black hinges and a low-iron glass spec is a common modern direction here.
Boutique Residence
Design-led smaller homes where the bathroom is a single composed moment. A frameless enclosure paired with brushed brass tapware and patterned floor tile is the look most owners reach for.
Vacation Residence
Holiday-house en-suite where the brief is “feels like a quiet hotel.” Clear glass with low-iron clarity and a single pivoting door does that with very little hardware in view.
From Sketch to Site — Three Stages
Share a bathroom plan, room dimensions, or a designer reference — that’s enough to start. We turn it into a working drawing for the enclosure. It covers glass panel sizes, hinge positions, and the wall and floor returns your contractor will need to allow for.
Every enclosure is fully assembled and photographed in our Guangdong workshop before being taken apart for shipping. Each glass panel, hinge, and seal kit comes labeled, so on-site assembly is straightforward — typically bolt-and-fix, not site-cutting.
Wooden crates built for ocean freight, with glass panels protected between foam-faced inner frames. Shipped to 60+ countries — including the USA, Australia, the EU, and across Asia.
After delivery, your contractor or installer handles fitting. We provide an installation guide and a step-by-step video. Where local installation is available in your region, we can help you find a vetted installer.
Frameless Shower Enclosure
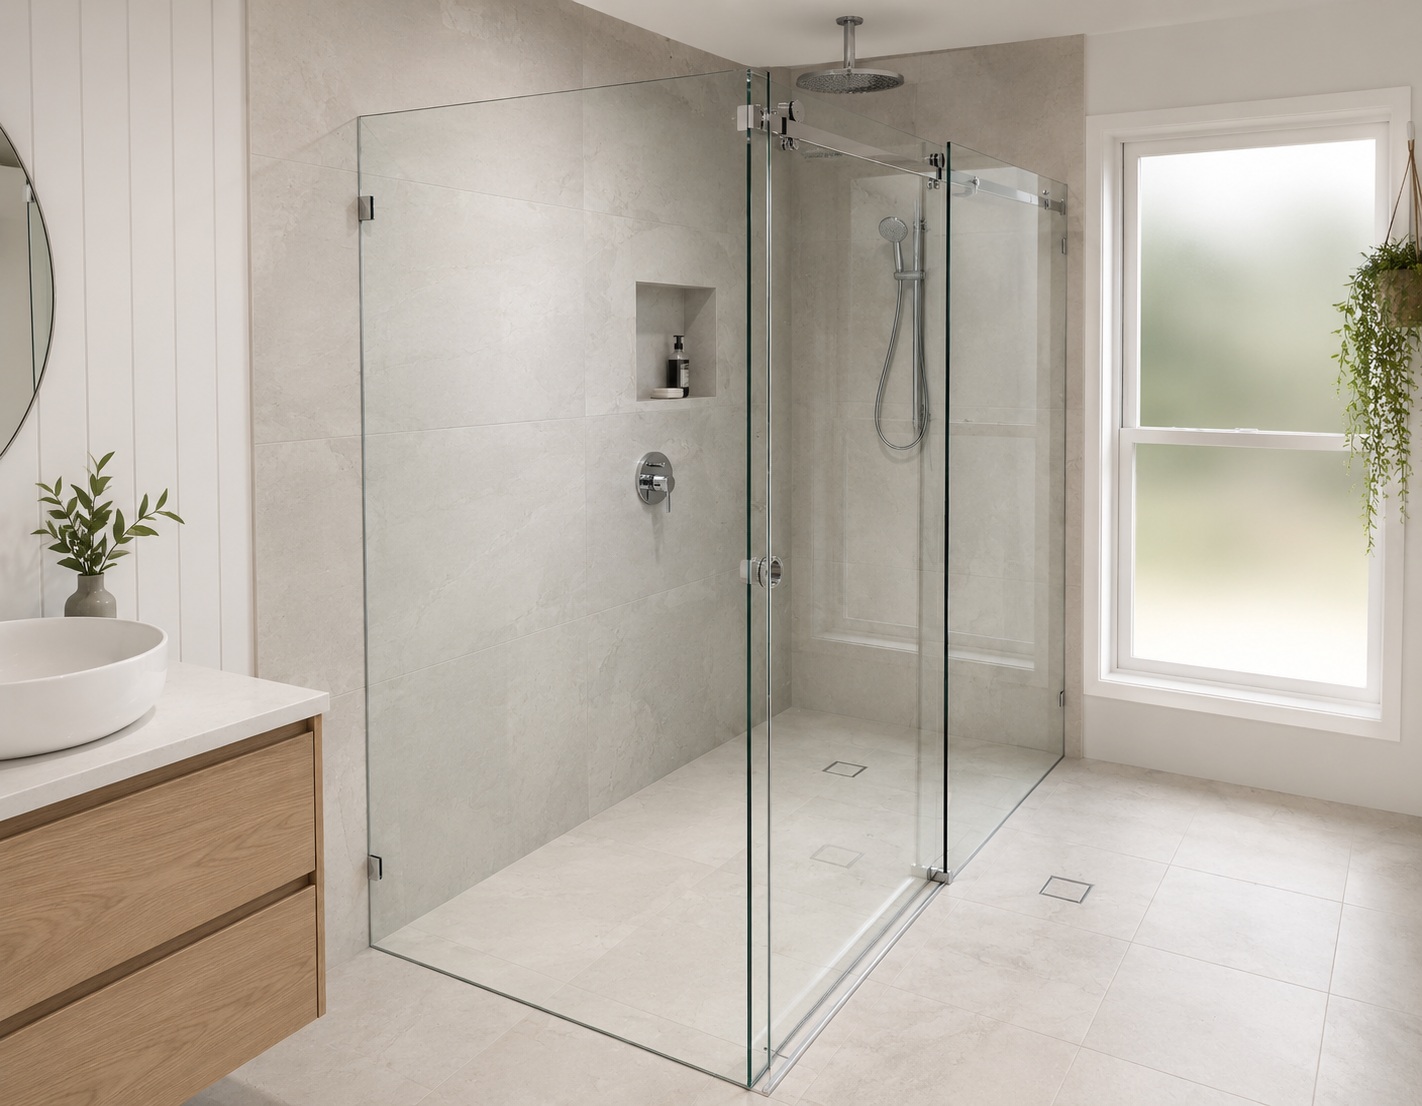
The Bare All-Glass Spa Bath — Heavy Glass, the Lightest Hardware, Fixed onto Finished Tile.
A spa-style master bathroom asks the glass to vanish. The owner wants stone, light, and brassware to carry the room, so the shower screen reads as a single uninterrupted plane with almost no visible hardware. That minimal configuration leans on heavy toughened safety glass standing on the smallest clamps a panel can structurally take.
Owners reach us at a recognisable moment, when the tile and stone are specified and the bathroom is nearly finished. The walls and floor are already finished surfaces by then, and the glass has to land against them cleanly. So the brief is rarely about the glass alone. It is about how lightly that glass configuration can sit against a room the owner has already perfected.
Why Heavy Glass Earns the Minimal Look.
The minimal configuration works for one structural reason: a heavier glass panel holds its own shape with very little support. Lose the top rail and the side frames, and the panel must stay rigid on a few clamps alone. A thicker, toughened panel manages that, which is why the spa aesthetic typically rests on the heavier gauge rather than the lightest available one.
That specification carries trade-offs worth naming early in the conversation. A heavier panel imposes more weight on the wall fixings, so the substrate behind the tile has to be sound enough to anchor it. The fewer the brackets, the more each individual one matters, and the more the panel dimensions have to be cut precisely true. We talk all of this through before a line is drawn.
So the right answer turns on what the bathroom is meant to feel like. Where the goal is a calm, near-frameless plane, the heavy glass on minimal hardware typically earns its place. Where a busier family bathroom needs everyday robustness instead, a braced configuration may suit the household better, and we map that decision out with you first.
How the Same Glass Lands on Different Finished Surfaces.
A Tiled Wall vs a Stone Slab.
The wall behind the glass sets the first variation. A tiled wall takes the clamp through grout lines, so we place fixings to miss the tile edges where we can. A full stone slab reads as one surface, which gives a cleaner fixing but asks for careful marking, since a slab gives no second chance. We draw the clamp positions onto your wall layout, so the holes land where the build can actually hold them.
A Flat Floor vs a Slight Fall.
The floor underneath the screen sets the second variation. A near-flat shower floor lets the glass meet a low channel cleanly along its base. A floor with a slight fall toward the drainage point shifts that base line gradually across the run. We supply the base seal over-length so the fitter trims it to the actual floor condition, rather than to a floor drawn dead level on paper.
A Single Bath vs a Matched Suite.
The scope sets the last one. A one-off master bath gets the glass tuned to one wall, one floor, and one hardware finish. A villa with several bathrooms quietly flips that logic, since the owner often wants the same minimal screen repeated across the suite. We settle the detail once, then carry the same clamp layout and finish cleanly across each room.
What Coordination Looks Like for a Bare Glass Screen.
Drawing-First Coordination begins with the genuinely hard part of a near-finished bathroom. We pin down the wall make-up, the clamp positions, and the floor line before anyone cuts glass. A finished tile wall leaves no room for a stray hole later, so the working drawing resolves every fixing point early and saves a scramble on site.
Trial Assembly Before Packing then stands the whole screen upright on our Guangdong workshop floor. We hang the panel on its clamps, confirm the swing and the seal, photograph the result, and take it apart for transport. We label each panel, clamp, and seal as it comes off, so the build in your bathroom becomes a clean bolt-and-fix job rather than guesswork.
Export-Ready Crating packs the glass in the order your fitter will raise it on site. We pad every edge and stand each panel vertical for the long ocean leg ahead. The crate lands ready to open, with the heavy glass seated low and the hardware bagged by panel for a safe, sorted lift.
What to Send Us About Your Bathroom.
A bathroom plan or a quick phone photo of the space gives us plenty to begin with. Add the opening width and height where the screen will stand, measured against the finished walls. Then note the wall make-up behind the glass, since a tiled stud wall and a solid stone wall hold the fixings in different ways.
One more line of detail helps us read the room. Tell us the hardware finish you have chosen, and whether the floor runs flat or falls to a drain. From there we turn your notes into a working drawing and a screen ready to ship.
After delivery, fitting is on your side. On site, your contractor or installer handled fitting directly from our drawings, with our assembly guide and step-by-step video to follow — or use your own local installer where needed.
Chat on WhatsApp →Compare the Semi-Frameless Shower → · see the Pivot Shower Door → · browse the full Shower Room range → · or pair with a Vanity Cabinet →