


Walk in Shower | Custom by DBM Factory


Walk-In Shower
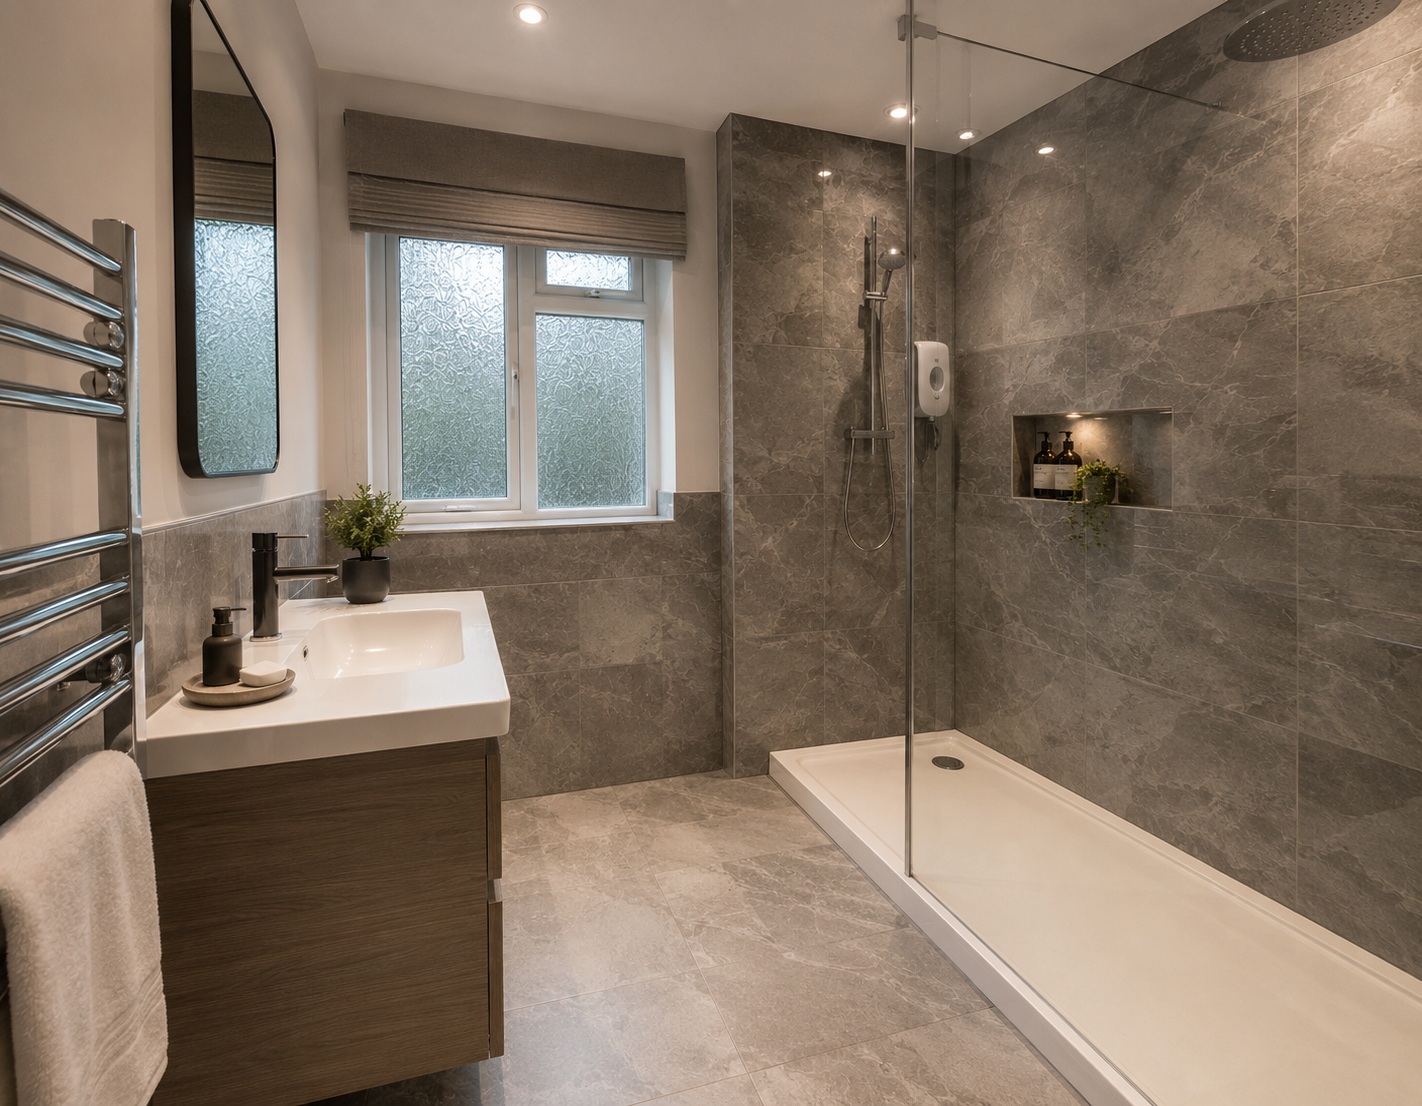
A walk-in shower opens straight off the bathroom floor — no door, no swing, just a single glass partition guiding the water. The result reads like the open showers in a quiet hotel: you walk in, the room continues, the experience is calm. Owners ask for it by name once they have used one.
We design and produce each walk-in shower around your project. Share the bathroom layout, a floor plan, or a designer reference. We turn it into a working drawing and build the glass partition and supports ready for shipment.
Spec the Shower to the Bathroom
Tempered Safety Glass — Drawing-Set
Standard tempered safety glass for shorter partitions held against a wall return; a heavier gauge where the panel is free-standing or the run is longer. Low-iron glass on request.
Hardware Finish — Brass / Black / Nickel
Brushed brass for warm, classic-feel bathrooms. Matt black on contemporary builds. Brushed nickel and polished chrome where the room tapware is one of those finishes. Hardware always matched to the wider bathroom fittings.
Threshold Detail — Flush Wet-Room / Curbed
Flush wet-room threshold where the floor finish runs continuously inside and outside the shower — the quintessential walk-in look. Curbed threshold where the bathroom build calls for a small upstand at the entry.
Bench & Niche Options — Drawing-Set
Internal stone bench, recessed niche for bottles, or fixed grab rail. All are marked on the working drawing so your tiler and wet-area builder can leave the right openings.
Where It Fits — Four Common Project Types
Modern Villa
Master en-suite where the owner wants the bathroom to read as one continuous spa. A long glass partition with a flush threshold and a stone-faced inner wall is the look that often anchors the room.
New Home
Drawn into the bathroom plan from the start, so the wet-area drainage, the floor falls, and the glass partition all line up. Common on architect-led builds where the brief is “continental hotel.”
Boutique Residence
Smaller design-led homes where the bathroom is a single composed event. Brushed brass hardware against a darker stone wall and a slim glass screen is a common direction for these projects.
Renovation Feature
Renovation where the owner is converting an old shower-tray bathroom into a wet-room. The new walk-in detail is the most-photographed part of the finished result.
From Sketch to Site — Three Stages
Share a bathroom plan, room dimensions, or a designer reference — that’s enough to start. We turn it into a working drawing for the walk-in shower. It covers the partition position, threshold detail, and any niche or bench cut-outs your wet-area builder will need.
Every glass partition, support bracket, and seal kit is laid out and photographed in our Guangdong workshop. Each part is checked against the working drawing before being prepared for shipping, with labels for on-site assembly — typically bolt-and-fix, not site-cutting.
Wooden crates built for ocean freight, with glass partitions protected between foam-faced inner frames. Shipped to 60+ countries — including the USA, Australia, the EU, and across Asia.
After delivery, your contractor or installer handles fitting. We provide an installation guide and a step-by-step video. Where local installation is available in your region, we can help you find a vetted installer.
Walk-In Shower
The Open Wet-Room — One Fixed Screen, No Door, and the Floor Fall That Holds the Water.
An open walk-in shower removes the door entirely. A single fixed screen guides the spray, the floor finish runs continuously through, and the bathroom reads as one calm wet-room. The configuration feels effortless, yet it depends on something the owner cannot see from a photo: the fall of the floor toward the drainage point.
Owners reach us drawn to that open, hotel-style read. The worry, once they consider it properly, is keeping the water where it belongs without a door to contain it. With no swing to close, the open layout relies on the screen position and the floor drainage working together. So the brief is really about the floor as much as the glass.
Why the Floor Decides an Open Walk-In.
The open configuration works for one reason owners rarely picture: the floor does the containment a door would otherwise provide. A continuous fall directs the water toward a drainage channel or a central point, so it never travels toward the dry bathroom. The fixed screen then handles the spray, while the floor fall manages the runoff that follows.
The trade-offs are honest, and they belong in the planning early. An open shower requires a properly built wet-area floor, since a flat or incorrectly graded floor lets water wander. The screen has to sit where it intercepts the spray without crowding the entry. We coordinate the glass to that floor design, though the wet-area construction itself sits with your contractor.
So the right answer turns on what the bathroom build can actually deliver. Where the floor can carry a proper fall and drainage, the open walk-in typically earns its place and reads beautifully. Where the construction cannot, a curbed or enclosed configuration may suit the room better, and we discuss that constraint before any glass is drawn.
How the Screen Responds to the Floor and Drainage.
A Linear Channel vs a Central Drain.
The drainage type sets the first variation. A linear channel along one wall pulls the fall in a single direction, which lets a long screen sit parallel and clean. A central point drain pulls the fall from several directions simultaneously, so the screen position has to accommodate that crossfall. We mark the screen line against the drainage configuration, so the glass sits where the water is already heading away.
A Flush Wet-Room vs a Low Curb.
The threshold sets the second variation. A flush wet-room runs the floor finish straight through, with no upstand at the entry and the screen base meeting the tile directly. A low curb adds a small upstand that helps contain water on heavier-use showers. The screen base configuration changes between the two, and we draw the fixing to match the threshold your build is using.
A Wall-Fixed Screen vs a Free Edge.
The screen support sets the last variation. A screen fixed along a wall return takes its stability from that wall, so a slimmer support can carry it. A screen ending in a free, open edge has no wall to lean on, which requires a sturdier fixing and often a discreet floor or ceiling stabiliser. We size the support to where the screen actually terminates in your layout.
What Coordination Looks Like for an Open Wet-Room.
Drawing-First Coordination begins with the part an open shower most depends on. We pin the screen line, the support, and the base detail against your floor fall and drainage before anyone cuts glass. The wet-area floor is your contractor's build, so the working drawing reads the screen to that floor and saves a clash on site.
Trial Assembly Before Packing then stands the screen and its support upright on our Guangdong workshop floor. We confirm the fixing, the alignment, and the edge finish, photograph the result, and take it apart for transport. We label the panel, brackets, and seal as they come off, so the build in your bathroom becomes a clean bolt-and-fix job.
Export-Ready Crating packs the parts in the order your fitter will raise them on site. We pad every glass edge and stand the screen vertical for the long ocean leg ahead. The crate lands ready to open, with the heavy panel seated low and the support hardware bagged for a safe, sorted lift.
What to Send Us About Your Wet-Room.
A bathroom plan or a quick phone photo of the space gives us plenty to begin with. Add the opening width where the screen will stand, and mark where the drain sits, since the drainage point shapes the screen line. Then tell us whether the floor uses a linear channel or a central point drain.
One more line of detail helps us draw the support. Tell us whether the screen meets a wall return or ends in a free edge, and which threshold the floor build uses. From there we turn your notes into a working drawing and a screen ready to ship.
After delivery, fitting is on your side. On site, your contractor or installer handled fitting directly from our drawings, with our assembly guide and step-by-step video to follow — or use your own local installer where needed.
Chat on WhatsApp →Compare the Frameless Shower Enclosure → · see the Pivot Shower Door → · browse the full Shower Room range → · or pair with a Vanity Cabinet →