

Railing Mounting Methods: Top-Mount vs Fascia vs Core-Drill -Railing Guides
Railing Guides · Mounting & Fixing
Railing Mounting Methods: Top-Mount, Fascia-Mount, Core-Drill & Glass Fixings
The main railing mounting methods are top-mount, fascia or side-mount, and core-drill. Top-mount posts sit on the surface. Fascia mounting bolts the railing to a slab edge. Core-drill posts drop into cored pockets. For glass, the fixings are spigots, a base channel, or standoffs. Each of these railing mounting methods changes the look and the substructure underneath.
How a railing attaches to the building matters as much as the material it wears. The mounting method you specify establishes the sightline, the finished floor elevation, and the strength the deck or slab has to carry underneath. It also determines how much of the frame stays visible from the terrace. This guide walks through each of the common railing mounting methods, identifies where each one performs well, and explains the substructure that each demands. That way you can establish the fixing early, during coordination, before anyone cuts a single hole.
Why the Mount Matters as Much as the Railing
Owners tend to select a railing by its material and its finish. The mounting method rarely gets a thought until the drawing stage. Yet the fixing shapes the final appearance just as strongly. A top-mounted post sits proud on the floor and reads as a clear, upright frame. A fascia-mounted railing hangs off the slab edge and liberates the whole walking surface. A cored post rises straight from the stone with no visible base plate at all. Same railing, three very different characters.
The mounting method also drives the engineering. Every railing has to resist a person leaning or falling against it, so the load travels down through the fixing and into the structure. A top-mount transfers that load into the slab face through anchor bolts. A side-mount converts it into a pull on the edge of the beam. A cored post distributes it into the surrounding concrete or stone. Each pathway asks a different question of the substructure, and each answer belongs on the drawing long before construction begins. Establishing the mounting method early keeps the terrace clean and the timeline calm.
There is a practical sequence to all this. First, establish the finished floor and the edge detail. Next, select a mounting method that suits both the appearance and the structure. Only then confirm the railing material and finish. Reverse that sequence and you risk a base plate that clashes with a stone floor, or a side fixing on an edge too thin to hold it. The sections below examine each of the common railing mounting methods in turn.
Top-Mount Railing
Top-mount remains the most familiar of the railing mounting methods. The post stands on the finished surface, and a base plate carries the anchor bolts down into the slab or the deck framing. You see the base plate, although a slim cover flange can conceal it. This mounting method suits almost every environment, from a villa terrace to a hotel rooftop deck, because it functions on concrete, on steel, and on a well-engineered timber frame alike.
The advantages are speed and forgiveness. Installers can position the base plates, drill, and bolt without disturbing the slab edge, so the edge detail stays uncomplicated. The mounting method also tolerates minor inaccuracies, because the base plate provides a little room to shim and realign. The trade-off is the visible plate and the reality that the post encroaches into the walking width by a small margin. On a narrow balcony that inch or two counts, and there the fascia alternative frequently prevails instead. For most decks and terraces, however, top-mount remains a popular, dependable selection.
Fascia and Side-Mount Railing
Fascia mount, also called side-mount, attaches the railing to the vertical face of the slab or beam rather than its top. The posts bolt through a bracket into the edge, so nothing intrudes on the floor. This mounting method liberates the entire walking surface and positions the railing slightly outward, which recovers a touch more usable space. On a narrow balcony or a stepped rooftop terrace, that recovery reads as a genuine difference.
The appearance is the attraction. With no base plate on the floor, the terrace stays clean and open, and the guard appears to float at the edge. Designers favour this mounting method on modern villas and boutique hotels where the floor should read as one uninterrupted plane. The trade-off is the demand on the edge. The load now pulls sideways on the slab face, so the concrete edge, its reinforcement, and the anchors all require sizing for that pull. A thin or lightly reinforced edge may need thickening or an additional steel angle beforehand. That is a coordination point, not a surprise, when the mounting method lands on the drawing early.
Core-Drill and Grouted Railing
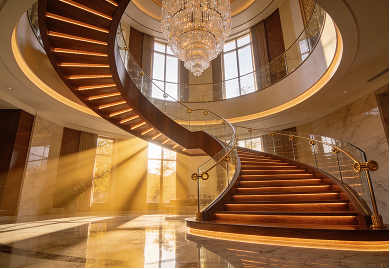
Core-drilling suits solid substrates such as thick concrete and natural stone. Installers bore a pocket into the surface, position the post inside, and secure it with a high-strength grout or an epoxy anchor. No base plate appears at all. The post seems to emerge straight from the floor, which delivers the cleanest, most seamless appearance of any mounting method. On a marble terrace or a cast concrete stair, that flush junction reads as genuine craftsmanship.
The reward is the finish, and the requirement is precision. Each pocket has to land in the correct position, at the correct depth, and the substrate has to be deep and sound enough to hold the post against the load. Stone especially demands care so the drilling does not fracture an edge. The grout or epoxy then needs to cure before the railing accepts any weight. This mounting method rewards a project that plans the pocket layout on the drawing and cores into a substrate proven to carry the load. Performed that way, core-drilling delivers a result that a base plate can never quite equal.
Glass Railing Mounting Methods
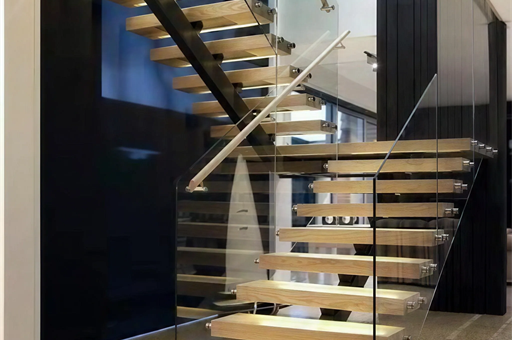
Frameless and semi-frameless glass introduces its own family of railing mounting methods, because the glass itself often carries the guard. The three common routes are spigots, a base channel, and standoffs. Each one grips the glass in a different manner, and each one requires a different edge detail underneath, so the decision again belongs on the drawing.
Spigots are small metal clamps, usually positioned along the base, that grip each panel and bolt downward or into the edge. They read as clean and minimal, with slender points of support and open intervals between. A base channel, by contrast, incorporates a continuous slot along the floor or the slab edge that holds the glass along its whole bottom line. The channel disappears fully beneath a cladding, so the glass appears as though it rises from the floor with no visible fixing. Standoffs are round buttons that anchor the glass back to a wall or a fascia, and they suit a side-mounted glass guard on a stairway or a balcony edge. We compare two of these routes in detail in our guide on spigot versus channel glass mounting systems.
Whichever route you select, the glass has to be the correct safety glass, and the fixing has to transfer the load into a substrate robust enough to retain it. A base channel distributes the load along a line, while spigots concentrate it at points, so the slab edge beneath a spigot run works considerably harder. This is why the pillar glass railing guide treats the fixing and the panel as one integrated system rather than two separate components.
Railing Mounting Methods Side by Side
The table below lines the main railing mounting methods up so you can scan them at a glance. Read it against your own edge detail and finished floor, because those two facts often rule a method in or out before looks even come into play.
| Method | Look | Substructure it needs | Well suited to |
|---|---|---|---|
| Top-mount | Visible base plate, upright frame | Sound slab or deck face for bolts | Most decks, terraces, roofs |
| Fascia / side-mount | Clear floor, railing at the edge | Strong reinforced slab edge | Slim balconies, modern terraces |
| Core-drill | Flush post, no base plate | Thick concrete or solid stone | Stone terraces, cast stairs |
| Glass spigot | Minimal clamps, open gaps | Edge strong at each fixing point | Frameless glass on pools, decks |
| Glass base channel | Hidden slot, glass from the floor | Continuous line of support | Seamless frameless terraces |
| Glass standoff | Round buttons, side-pinned glass | Solid wall or fascia to pin into | Stair and balcony edges |
What the Substructure Must Carry
Every mount delivers a load to the structure below, and the substructure has to accommodate it without cracking, loosening, or deflecting too far. The load originates at the top rail, where a person leans or falls, and it travels down through the post and the fixing into the slab, the beam, or the stone. A structural designer proportions the anchors, the edge, and the reinforcement for that pathway. The pathway differs by mounting method, which is why the drawing has to identify the mount before anyone can proportion the structure.
A top-mount transfers the load downward and across the slab face, so the concrete or the steel decking under the base plate needs sufficient strength and edge distance for the bolts. A fascia mount converts the load into a pull on the slab edge, so that edge requires additional reinforcement or a steel angle to distribute the pull. A cored post depends on the depth and integrity of the surrounding material, so a thin topping or a hollow core will not suffice. Glass fixings introduce the panel itself into the calculation, since a channel shares the load along a line while spigots concentrate it at points. None of this is exotic. It is simply the reason a railing requires engineering to its mounting method, not attachment at the very end.
Cost and Coordination Drivers
Mounting cost varies with the method and the substrate rather than with one flat figure. Because every railing is manufactured to order, the honest way to consider budget is in drivers. Top-mount tends to occupy the friendlier end, since it requires only a sound face and standard anchors. Fascia mount can cost more where the slab edge requires additional steel or reinforcement to accommodate the pull. Core-drilling introduces the coring labour and the curing time, and it escalates on hard stone. We price each project from its drawing, so there is no fixed price list here.
Coordination is the quieter driver, and it frequently matters more than the raw hardware. A mounting method that conflicts with a finished floor, an edge too thin for a side fixing, or a pocket layout drawn late can all cost valuable days on site. That is why we establish the mounting method on the drawing, identify every fixing point, and trial-assemble the railing before it ships. When the components arrive, they align with the openings the drawing specified. When you are ready to plan the fixings, our custom balustrade and railing systems encompass every mounting method here in one place.
Code and Load Basics
Whatever the mounting method, a railing is a guard, so it has to satisfy the safety regulations for height, gap, and load. Common US references position the guard height for a residence at around 36 inches, and many areas require 42 inches above a set fall height, which is typical in shops, offices, and apartment corridors. The infill is usually configured so a 4-inch ball cannot pass, and the guard must resist a defined load at the top rail. The mounting method is what conveys that load into the structure, so it sits right at the heart of the code verification.
The mounting method connects into code in a direct way. A fascia fixing has to demonstrate the slab edge can accommodate the horizontal pull. A cored post has to demonstrate the pocket and the substrate can retain the same load. A glass channel or a spigot run has to establish the fixing and the safety glass operate together as one guard. Standards such as the IBC and IRC in the United States, plus AS 1170 and AS 1288 in Australia, articulate the load and glass requirements, and your local adopted edition is what actually governs. Our pillar glass railing guide covers the glass side of that verification in more depth. We always recommend you confirm the current edition with your local team before we build.
Railing Mounting Methods FAQ
What are the main railing mounting methods?
The main railing mounting methods are top-mount, fascia or side-mount, and core-drill. A top-mount post stands on the surface with a base plate. A fascia mount bolts the railing to the slab edge instead. A core-drill post drops into a cored pocket. For frameless glass, the fixings are spigots, a base channel, or standoffs. Many projects combine two methods across the same building where the edges differ.
What is the difference between top-mount and fascia-mount?
A top-mount post stands on the finished floor, with a base plate bolted down into the slab. A fascia or side-mount fixes the railing to the vertical face of the slab edge instead. Top-mount is quick and forgiving, though the base plate stays visible. Fascia mount clears the whole floor and looks cleaner, but it asks more of the slab edge, which often needs extra reinforcement.
Which mount gives the cleanest, most seamless look?
Core-drilling gives the most seamless look, because the post rises straight from the floor with no base plate at all. A hidden base channel does the same for frameless glass, holding the panel in a slot under the cladding so the glass appears to grow from the surface. Both routes ask for a solid substrate and careful layout on the drawing, so plan them early rather than on site.
Do different mounting methods need different substructure?
Yes, and this is the point owners most often miss. A top-mount needs a sound slab face for the bolts. A fascia mount needs a strong, well-reinforced slab edge to take the sideways pull. A cored post needs deep, solid concrete or stone. Glass channels spread the load along a line, while spigots gather it at points. Naming the mount on the drawing lets the designer size the structure to match.
Can I choose the mounting method after the building is up?
You can, but it costs you freedom and often money. The strongest results come from settling the mount during the design stage, while the slab edge, the reinforcement, and the finished floor can still adapt around it. A late decision may force a visible base plate where you wanted none, or added steel on a thin edge. Lock the mounting method early, and the railing and the structure develop together.
Keep exploring the railing cluster: start with the pillar on the glass railing guide, then read our comparison of spigot versus channel glass mounting systems and the practical guide to how to clean glass railings. Ready to specify? Browse our custom balustrade and railing systems.
Double Building Materials draws, manufactures, trial-assembles, crates, and ships your railing with the mount your project calls for. Your own contractor or installer handles on-site drilling, fixing, and local code sign-off — we can help you find one where available. Load and code values above are common industry and US references (IRC / IBC / ADA / OSHA; AS 1170 / AS 1288 / NCC where relevant); your local adopted edition governs, so confirm the current version with your local team. With 25+ years and 800+ projects shipped to 60+ countries from our 4,500 m² factory in Guangdong, China, we draw and trial-assemble every railing before it ships.
Talk to us on WhatsApp →